


Now that you have seen some of the setups and equipment that I use I will try to explain the techniques that I use. Please keep in mind that with all things there are as many different ways to do it as there are people doing it. I make no claims that this is the best way, the right way, the only way or even a good way, it is simply the way that I do it J


I check to make sure that the camera is set to manual mode.
I set the Image-Recording Quality. I usually set this at the highest setting that my camera allows which is 3456 x 2304 pixels. This allows me to blow the picture up pretty large if I want to and see a great amount of detail without the picture becoming grainy or pixilated.
I set my aperture setting. From the forums I learned that shooting using a higher f-stop allows you to get a greater depth of field. More of your picture will be in focus. If you really want to give yourself a headache check out this link. This fellow explains more than anyone needs to know about f-stops. Bob Shaw from the Badger Marble Club claims that “all lenses have a sweet spot in the f-stop range” and suggests that to find it you start at your highest f-stop, take a picture then step up and take another picture and continue this until you reach f8 or so and then compare the pictures and shoot at which ever one looks best. This is a great way to figure out what f-stop to shoot at. I shoot at f-32.
I mount the camera onto the copy stand. The copy stand has a horizontal bar that is attached to the upright support. It has a threaded end that the camera screws onto.
Then I set my exposure setting or shutter speed. At an f-stop of 32 and with the lighting I’m using my shutter speed is about 3”2 or 3.2 seconds. My camera has a little LED indicator that shows how far off you are from a standard exposure for the f-stop that you are using. By turning a little wheel I can adjust the exposure to a “Standard” setting which I have found works pretty well. Because of such a long exposure time there is no way to hand hold the camera without the pictures being blurry. That is why I use the copy stand and the remote control to trip the shutter release.
Then I set the Custom White Balance. Check your cameras instructions, if you have a SLR camera I suspect it will tell you how to do this. This really helped to improve the color of my pictures. By doing a custom setting it helps to compensate for the poor spectral quality of my lighting and makes the color of my pictures more accurate.
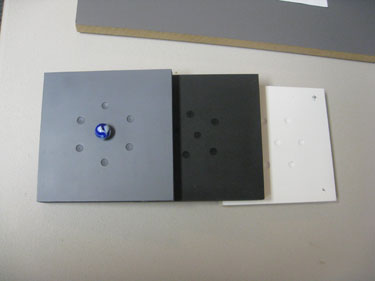
The first thing I do is set the marble on a colored background. You can see in the picture the three different backgrounds that I’ve made. I have drilled divots into the boards to keep the marbles from rolling around and painted them flat grey, flat black and flat white. I usually stack the backgrounds and if I need to adjust the distance from the camera lens to the marble sometimes all I have to do is remove one or more boards. The reason that this is sometimes necessary is that I put the camera lens as close to the marble as I can to fill the viewfinder with the marble. If I have been shooting 5/8ths marbles and then I shoot a ¾ inch marble it will “overflow” the viewfinder and by removing a board or two it gets the marble to fit in the viewfinder again. This is easier than moving the whole camera up or down.
I shoot 90% of all my pictures on the grey board. Grey seems to go with about everything.
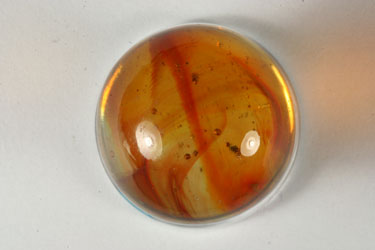
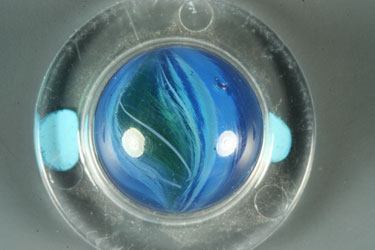


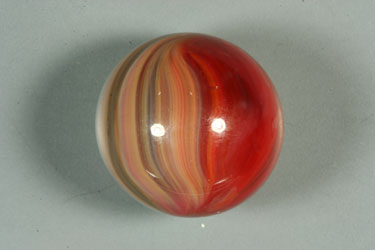
I use the white background when I’m shooting clear based marbles. The white background seems to reflect the light back up through the marble making the inside of the marble more visible. Another technique I use to accomplish this is to set the marble on a clear plastic stand although I don’t think this works as well as the white background. The first two pictures above show the marbles on the different backgrounds and the next two pictures show the marbles after they’ve been edited.
As far as the black background, I can’t say that I ever use it but I’ve got it if I need it J


I usually try to take four pictures of each marble, one of each pole and then two side shots. This seems to catch most of the marbles features and is generally enough to identify the marble.